Patters go on many things but here are a few.
1) T-Shirts.
2) Walls.
3) Ceilings.
4) Carpet.
5) Shoes.
6) Tattoos.
7) Clothes.
8) Posters.
9) Schools.
10) Work Places.
11) Flooring.
Thursday, September 24, 2015
Thursday, September 17, 2015
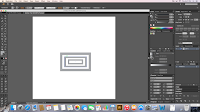
Ceiling Tile Tutorial
The Skills that i used for this Tutorial was how to make a pattern tool. The was the main tool. I used other tools such alt, rectangle tool, fill tool (Color). The design i chose was what i came up with. I always draw and put different shapes in each other tell I run out of room. The audience this is intended for is my teacher and classmates , and anyone who likes my pattern. These are the steps to create my pattern.
 3) Add color. (I chose grey and white.).
 4) Group the squares together to make it all 1 piece.
 5) Go to the tool bar on the top.
 10) I did brick by row.
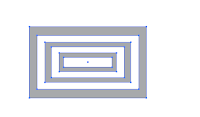
 The Pattern on the left is what the pattern should look like when you are done.
1) First make a big square.
2) Press down on alt in the middle and make squares in side each other.
 3) Add color. (I chose grey and white.).
 4) Group the squares together to make it all 1 piece.
 5) Go to the tool bar on the top.
6) Press option.
7) Go to pattern.
8) Push make pattern and make the pattern.
9) Mess around with the pattern and how they are lined up. Find what is preferable to your liking.
 10) I did brick by row.
11) Enjoy your pattern.
 The Pattern on the left is what the pattern should look like when you are done.
 Ceiling Tile


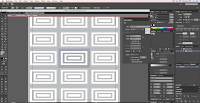
These are the ceilings tiles we have to make for class. The very top tile is my personal tile.The first tile on the left is the Chevron Tile. The one on the right is a Japanese tile we had to make.
The first two we made was a tutorial video. The tile on the top is a tile i made on my own after learning how to create patterns from the tutorial video.
My Pattern i made on my own is on the top.
1) First make a big square.
2) Press down on alt in the middle and make squares in side each other.
3) Add color. (I chose grey and white.).
4) Group the squares together to make it all 1 piece.
5) Go to the tool bar on the top.
6) Press option.
7) Go to pattern.
8) Push make pattern and make the pattern.
9) Mess around with the pattern and how they are lined up. Find what is preferable to your liking.
10) I did brick by row.
11) Enjoy your pattern.
Monday, September 7, 2015
Professional Project Review Blog Post #1
Write a summary/scope of the project? This is a story that talks about a young girl who is a normal teenage girl, but she has a side to her not all girls have. She is a powerlifter. All the shots in this video are put together to the best story with a beginning, middle, and end. The scope of the project is to show how this girl is different and unique.
Using the principles of design for your area of focus, analyze the professional work?
The 6 shot sequence was used good through out all the scenes of this video. There were 18 scenes plus in this video. So that means the 6 shot sequence must of been used at least 3 times.
Give specific evidence?
When the mom and daughter were in the kitchen it kept changing scene angles. First it starts up with a over the shoulder of the mom then it goes to a close-up of the moms hands cooking, to a wide shot of the mom and dad.
What story was told and how was it told?
The Story that was being told was a story of a high school girl who is a normal girl who likes to hang with mom and dad, But when she hangs with her dad she likes to lift weights.
What is one element from this work you would apply to your own work?
I would apply the scene quality. To be exact the quality of the close up of the hands.
What is one element you have already learned that is applied to this project?
The wide and extra wide shots, but i know the 6 shot sequence.
Based on best practice, what did the creator do well? Why?
The 6-shot sequence was good. It's sometimes a struggle to get a good 6-shot sequence.
Based on best practice, how could this work improve? Why?
I would of liked to had seen a better over the shoulder shot scene.
General thoughts & conclusions?
I really liked this video, how it told a story and also had all the shots of the 6 shot sequence at least three times. I like how the close-ups of the heads are really good.
Personal Project Review Video Assignment #1
What was the scope of the project?
The scope of the project was to tell a story to the audience with a beginning, middle, and end without using words or letters. We couldn't move the camera, but we could use are 6 shot sequence.
What was your process (speak to Pre-Production...idea, concepting, storyboards, etc.; Production...the actual creation; Post-Production...editing)?
The process was simple my partner and i decided on a procedure we wanted to do. We chose the story that would best tell a story, that had a beginning, middle, and end. Once we figured out what we wanted to do, we talked about our ideas and what we wanted to get out of the project. After talking about we story boarded what we wanted to do. After that we planned out what days we were gonna film and edit.
What did you learn along the way?Technically (Software/Hardware etc.)Professionally (Collaboration, Teamwork, Project Deadlines)
Team work is key when you are working with a partner, if your not on the same page and collaborate your thoughts something could go wrong with the video.
What would you do different? Why?
I would personality like to follow the story board better and follow it more closely i felt like after the first 4 scenes we went off of what we thought was gonna be good instead of following what we planned out.
What would you do the same? Why?
The first thing i would do the same is keep my partner the same, i liked who I worked with and we worked good together.
What experiences will you draw from to enhance your next project?
Do better on the close-ups and or add more close ups.
General thoughts & conclusions?
I liked what we did i like how there is a beginning, middle, and end. We did all the required elements to project. We accomplished what was set out towards us and that was to tell a story in a video without using words or letters, and also still telling a story to audience.
Subscribe to:
Comments (Atom)